Please Read Before Signing Up For A Class:
You must be a Guild member in good standing to attend classes.
Liability Waivers plus Equipment Operation and Safety Training must be completed before the start of class.
New Members that join the Guild on or after July 1st, and also sign up for the Habitat for Humanity Cabinet Build Class, will have their membership extended through December of the following year.
Members of other recognized Woodworking Groups or Guilds will be considered Members for purpose of class registration.
Non-members may join now. Join Now

2026 Class Schedule
Habitat for Humanity Cabinet Build Class
August 22nd, 2026
9:00am-4:00pm
Cost $100.00
Each year the Guild builds kitchen cabinets and bathroom vanities for a Habitat for Humanity Holiday House. This class will take you through the complete steps of building cabinets, from face frames, carcass construction, doors, dovetailed drawers, finishing, and installation in the home. You work in teams of 4-5 people and everyone gets to do every step of the project. Starting the end of August and finishing with installation mid December, the class will meet once or twice a month to complete the cabinets.
Prerequisites:
You must be trained and signed off on the following tools prior to first class on August 22, 2026. There will not be time during class for this training, so you need to get with a Guild supervisor for training and sign off prior to class. Items in bold are required for the first class.
Table Saw
Dado Saw
Miter Saw
Portable/Handheld Power Tools
Drill Press
Handheld Router
Router Table
Jointer and Thickness Planer are optional and only required if you opt to help with milling activities outside of the scheduled classes.
Class 1 - August 22, 2026 - Orientation and Face Frame Build
Class 2 - September 12, 2026 - Drawer Boxes
Class 3 - September 26, 2026 - Doors and Drawer Fronts
Class 4 - October 10, 2026 - Carcass Construction
Class 5 - October 24, 2026 - Spray Finish
Class 6 - November 7, 2026 - Attach Doors, Drawers, and Pulls
Class 7 - Early December - Installation of Cabinets at Holiday House
Class 8 - TBD - Holiday House Dedication
The fee for the class is $100. You must be a member in good standing to attend.
Rob Cosman Masterclass
Subject: Dovetails
When: October 3, 2026 10:00-12:00
Where: Zoom: You can attend at your home, your shop or at the Guild with the big screen in the classroom.
Cost: $75.00. The aggregate class fees from this class will be sent by the AWG to The Purple Heart Project. The PHP was started in 2016 by Rob benefiting combat wounded veterans through the therapy of hand tool woodworking.
Rob Cosman, a master woodworker, is widely known for his expertise in cutting dovetails. Rob has his own methods of cutting dovetails which he will share and instruct for the AWG on October 3rd. Rob has stated that 80% of students using his offset method of cutting dovetails, are able to produce perfect dovetails on the first or second attempt.
Not only are you able to learn this method from a Master, you are also helping contribute, through your participation, to combat wounded veterans the therapy of hand tool woodworking!
The minimum donation the AWG can make to assure this class is $1000 to the Purple Heart Project. If we are unable to have enough students signup to achieve this minimum donation, this class will unfortunately have to be cancelled.
If the class is cancelled, refunds will be issued to all that paid their fee.
Class fees, as normal, can be paid under the class description at the AWG website under Education.
For those individuals that are unfamiliar with Zoom, it is an interactive real time video through your phone or computer.
You will see Rob and he will see you. You will be able to ask questions and follow along as he instructs on his offset method of cutting Dovetails.
Prior to the class, with sufficient time, a Zoom link will be sent to all that are signed up. You will be able to download the Zoom app and make sure everything is working properly.

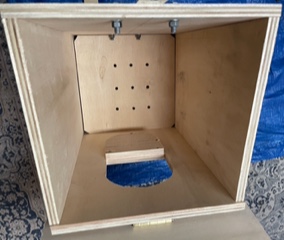
Building a Basic Box
Instructor: Chuck Wood
When: October 31, 9:00-3:00
Cost: $50.00
Class will be limited to 6 participants
This is a demonstration class and participants will not be using any machines throughout the class. No machine sign off will be required.
Whether you are building a jewelry box, a keepsake box, a humidor or an attractive box to put on a shelf, the basics are the same.
What kind of joinery will the box have, dovetails, miters, box joints, etc.?
Will the top be a veneered piece of plywood inset to rabbets on the sides to accept the top or will it be a hardwood floating top that sits in a frame?
There are a lot of questions that go into the planning of your build and these are just some of those questions.
Building a box in less than a day’s time with machine setup, test cuts, actual cuts, finishing cuts and fitting, not to mention glue up before proceeding to next steps… would be a very long day.
Understanding the steps of the process and the necessity of these steps goes a long way to assuring a successful build.
In order to assure the build in one day:
I will provide the class all four sides with the necessary rabbets and grooves. We will go to the router table and discuss the setup for each and the need for a test piece to be run to ensure accuracy. I will also bring the top and bottom for this box. The top I will have veneered but we will need to fit it in the carcass once it is glued up. The bottom will have already been partially fitted but we will discuss the set up on it as well at the router table.
We will finish fit the miters on all sides, do a dry fit and glue up. This completes this box for demonstration purposes.
Now we move to the second box I will bring. This box will be just like the first box we just completed but it will have already been glued and dried. Now I will cut the miter key slots for the keys on the tablesaw. I will have brought the keys to be inserted and we will discuss how they were made and glue them in the slots. In the interest of time, we will be using Titebond Speed Set glue which will be set after 30 minutes. Once the glue is dry, we will cut and sand flush to the box. Just to be safe, we will cover each slot with blue tape before the next step. Next, I will sever the top on the tablesaw and sand the two parts for a flush fit. Finally, we will insert the slip liners to the bottom of the box and complete any necessary fitting. We will discuss how the slip liners were made. We will complete the project with any fitting necessary for the top to fit on to the bottom.
This will complete the second box. What we will have focused on are the basics and many steps of the build process.
I will bring sleds and tools I use in the cutting and finishing process. I will also bring other box examples (failed boxes for one reason or another) but we will discuss those, time permitting.
Guitar Setup
Instructor: Jason Burns of Homewood Music
When: November 14, 2026
Cost: $100.00
Guitar Setup, Nut, Saddle and Fretwork.
This class covers the fundamentals of professional guitar setup and fretwork, with an emphasis on understanding why adjustments are made rather than just following measurements.
Learn how to evaluate an instrument, diagnose common play-ability issues, and make the adjustments needed for proper action, intonation, tuning stability, and overall feel.
Topics include:
● Evaluating an instrument before setup
● Neck relief and truss rod adjustment
● Measuring and setting action
● Nut evaluation, slot depth, spacing, shaping, and fitting
● Making and fitting acoustic guitar saddles
● Diagnosing fret problems
● Replacing frets and planing the fingerboard
● Fret leveling, crowning, dressing, and polishing
● Proper use of common setup and fretwork tools
● How the nut, frets, neck relief, and saddle work together as a system
● Developing an efficient, repeatable setup process
The goal is not just to teach specifications, but to help learn how to evaluate an instrument and understand what it actually needs.

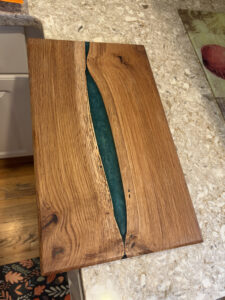
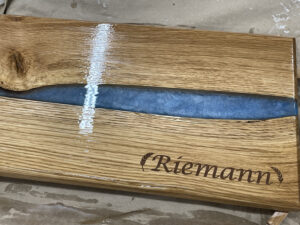
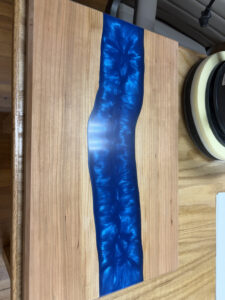
Charcuterie Board with Epoxy River Build
Instructors: Bob Baumgartner, Rick Ford
December 5th & 12th, 2026
9:00am-4:00pm
Cost: $125.00
Class will be limited to seven participants.
Our last class this year is the build of a unique Charcuterie Board with an Epoxy River flowing through.
Charcuterie boards can be the focal point of formal or informal gatherings, especially when you have made the board! This board will definitely stand out as a specialty to be admired.
Once you have learned the process for making this board, the possibilities for transferring this skill are endless.
Have you ever wanted to incorporate some epoxy resin into some of your woodworking projects? We will be making a charcuterie board with an epoxy river for each student to take home with them.
Each student will need to bring their own wood to fit into a 12”x18” mold. Board thickness recommended from 1 – 1-1/8”. Finished boards to be roughly ¾” thick, after planing and sanding. All other materials will be provided.
Prerequisites: Machines to signed off on: (bandsaw, table saw, planer, jointer)